

For a very long time, I’ve wished to sort a Stata command like this,
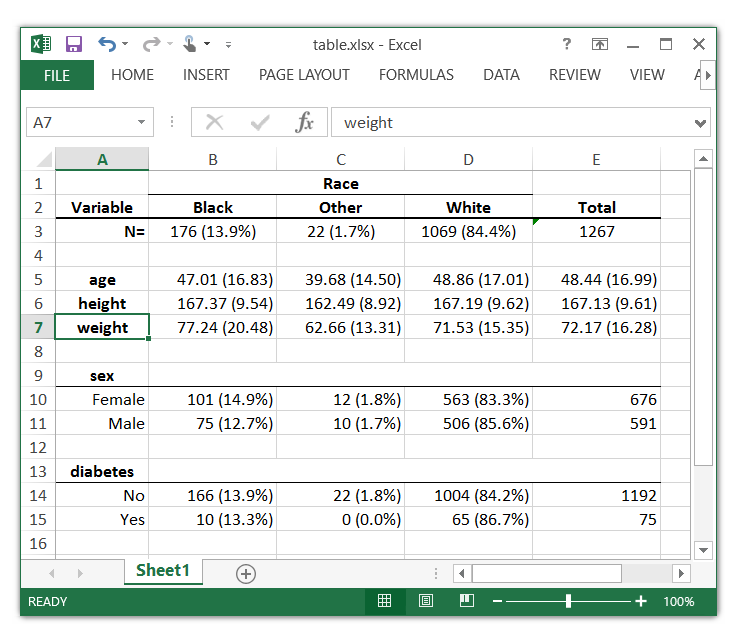
. ExcelTable race, cont(age peak weight) cat(intercourse diabetes)
The Excel desk desk.xlsx was created efficiently
and get an Excel desk that appears like this:
So I wrote a program referred to as ExcelTable for my very own use that creates Excel tables just like the one within the screenshot. My guess is that lots of you wish to have an analogous program however you may choose a unique format. Or possibly you wish to write a do-file that creates an analogous desk. I can’t presumably anticipate all of the totally different layouts you may want, so I’m going to put in writing a collection of weblog posts to indicate you create your personal Excel tables. I’ll even present you write your personal model of ExcelTable. Right now I’m going to deal with formatting expressions and cells.
We’ve got made some enhancements to putexcel in Stata 14.2, so it would be best to replace your copy of Stata to run the examples under. Chances are you’ll recall that Kevin Crow has written two weblog posts about putexcel titled Export tables to Excel and Retaining an Excel cell’s format when utilizing putexcel. You will have to set your Stata model to 13.1 to run the examples in Kevin’s weblog posts. It could be too distracting to listing the variations between the putexcel syntax earlier than and after Stata 14.2, so I’m solely going to indicate you the syntax as of Stata 14.2.
Instance 1: Setting a vacation spot file
Let’s start by setting the vacation spot file and sheet for our Excel desk
. putexcel set Table1.xlsx, sheet(Sheet1) exchange
Word: file shall be changed when the primary putexcel command is issued
It’s essential to set a vacation spot file earlier than you run some other putexcel instructions. All subsequent putexcel instructions will write to Sheet1 within the file Table1.xlsx till you specify a unique desk with putexcel set.
Instance 2: Writing a easy expression to Excel
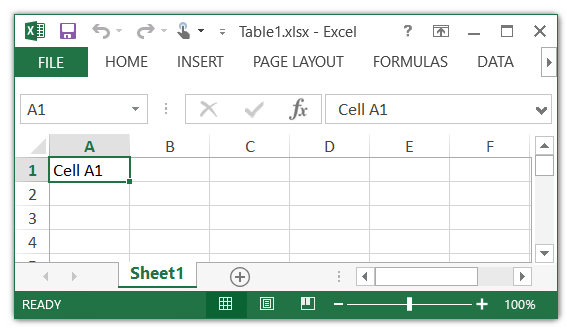
Subsequent, let’s write an easy expression to Table1.
. putexcel A1 = "Cell A1"
file Table1.xlsx saved
Instance 3: Specifying textual content alignment in cells
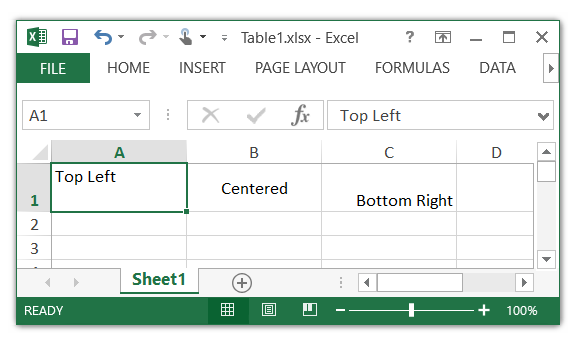
I can format expressions by including choices to putexcel. For instance, I can specify the horizontal and vertical alignment of the expressions within the cells.
. putexcel set Table1.xlsx, sheet(Sheet1) exchange
Word: file shall be changed when the primary putexcel command is issued

. putexcel A1 = "High Left", high left
file Table1.xlsx saved

. putexcel B1 = "Centered", vcenter hcenter
file Table1.xlsx saved

. putexcel C1 = "Backside Proper", backside proper
file Table1.xlsx saved
Instance 4: Daring, italics, underline, and strikeout textual content
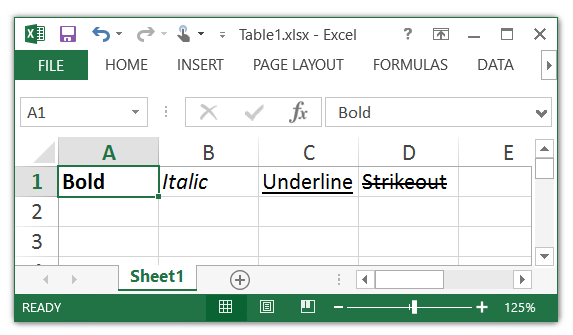
I can even write expressions utilizing daring, italics, underline, or strikeout textual content.
. putexcel set Table1.xlsx, sheet(Sheet1) exchange
Word: file shall be changed when the primary putexcel command is issued

. putexcel A1 = "Daring", daring
file Table1.xlsx saved

. putexcel B1 = "Italic", italic
file Table1.xlsx saved

. putexcel C1 = "Underline", underline
file Table1.xlsx saved

. putexcel D1 = "Strikeout", strikeout
file Table1.xlsx saved
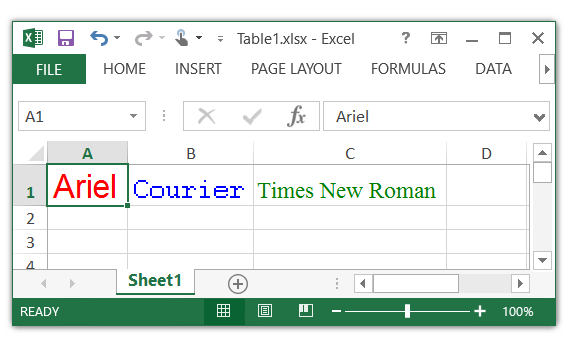
Instance 5: Specifying the font, the font dimension, and the colour
I may even specify the font, the font dimension, and the colour utilizing the font() possibility.
. putexcel set Table1.xlsx, sheet(Sheet1) exchange
Word: file shall be changed when the primary putexcel command is issued

. putexcel A1 = "Ariel", font(ariel, 20 , pink)
file Table1.xlsx saved

. putexcel B1 = "Courier", font(courier, 16 , blue)
file Table1.xlsx saved

. putexcel C1 = "Occasions New Roman", font(timesnewroman, 14 , inexperienced)
file Table1.xlsx saved
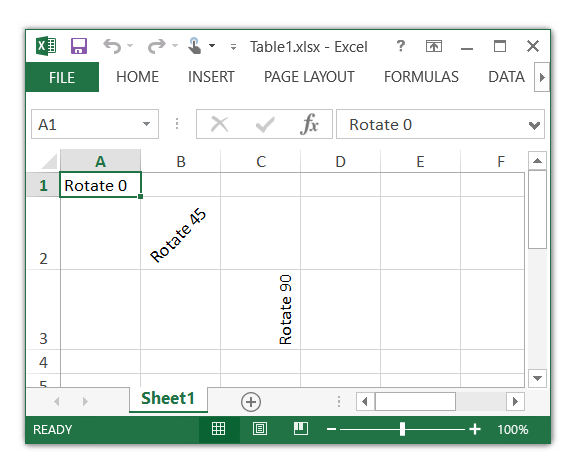
Instance 6: Rotating expressions
Typically, it’s simpler to indicate labels in a desk by rotating them. I can rotate an expression utilizing the txtrotate() possibility.
. putexcel set Table1.xlsx, sheet(Sheet1) exchange
Word: file shall be changed when the primary putexcel command is issued

. putexcel A1 = "Rotate 0", txtrotate(0)
file Table1.xlsx saved

. putexcel B2 = "Rotate 45", txtrotate(45)
file Table1.xlsx saved

. putexcel C3 = "Rotate 90", txtrotate(90)
file Table1.xlsx saved
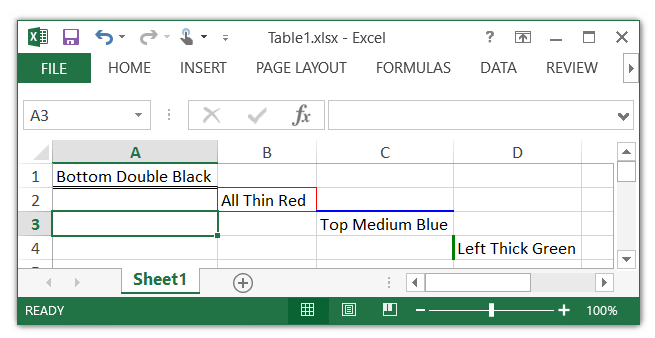
Instance 7: Specifying the border location, type, and colour
Cell borders and shading can be utilized to create an general look to a desk. I can use the border() possibility so as to add borders to particular person cells.
. putexcel set Table1.xlsx, sheet(Sheet1) exchange
Word: file shall be changed when the primary putexcel command is issued

. putexcel A1 = "Backside Double Black", border(backside, double, black)
file Table1.xlsx saved

. putexcel B2 = "All Skinny Crimson", border(all, skinny, pink)
file Table1.xlsx saved

. putexcel C3 = "High Medium Blue ", border(high, medium, blue)
file Table1.xlsx saved

. putexcel D4 = "Left Thick Inexperienced", border(left, thick, inexperienced)
file Table1.xlsx saved
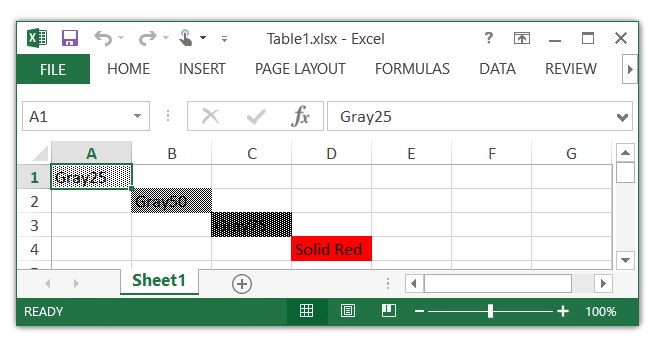
Instance 8: Specifying the fill sample for cells
And I can use the fpattern choice to shade particular person cells.
. putexcel set Table1.xlsx, sheet(Sheet1) exchange
Word: file shall be changed when the primary putexcel command is issued

. putexcel A1 = "Gray25", fpattern(gray25)
file Table1.xlsx saved

. putexcel B2 = "Gray50", fpattern(gray50)
file Table1.xlsx saved

. putexcel C3 = "Gray75", fpattern(gray75)
file Table1.xlsx saved

. putexcel D4 = "Strong Crimson", fpattern(strong, pink)
file Table1.xlsx saved
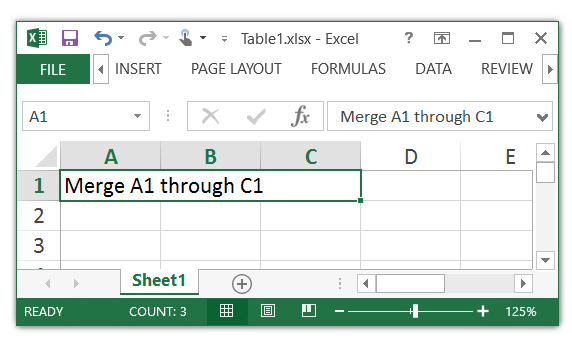
Instance 9: Merging cells
I would prefer to merge cells to create a title for a number of columns.
. putexcel set Table1.xlsx, sheet(Sheet1) exchange
Word: file shall be changed when the primary putexcel command is issued

. putexcel A1:C1 = "Merge A1 by C1", merge
file Table1.xlsx saved
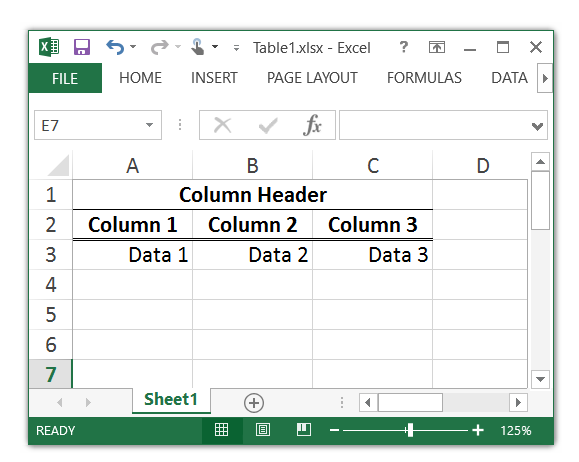
Instance 10: Combining choices
These formatting choices may be mixed to customise the format of my desk. For instance, I would want to create a column header by merging a number of cells, create column titles with a double border on the underside of every cell, and add some knowledge to my desk.
. putexcel set Table1.xlsx, sheet(Sheet1) exchange
Word: file shall be changed when the primary putexcel command is issued

. putexcel A1:C1 = "Column Header", merge hcenter daring border(backside)
file Table1.xlsx saved

. putexcel A2 = "Column 1", hcenter daring border(backside, double)
file Table1.xlsx saved

. putexcel B2 = "Column 2", hcenter daring border(backside, double)
file Table1.xlsx saved

. putexcel C2 = "Column 3", hcenter daring border(backside, double)
file Table1.xlsx saved

. putexcel A3 = "Information 1", proper
file Table1.xlsx saved

. putexcel B3 = "Information 2", proper
file Table1.xlsx saved

. putexcel C3 = "Information 3", proper
file Table1.xlsx saved
These are a few of the formatting choices that you would be able to specify with putexcel. Yow will discover a whole listing of formatting choices within the [P] putexcel entry within the Stata Programming Reference Handbook.
Subsequent time, I’ll deal with writing totally different sorts of expressions to Excel.