Why do individuals misinterpret your knowledge? As a result of they’re knowledge illiterate. That’s your reply. Carried out. The top of the article. We will go residence.
Sure, it’s true; knowledge literacy remains to be at low ranges in lots of organizations, even these which can be “data-driven”. Nonetheless, ours is to not go residence, however to stay round and attempt to change that with the way in which we current our knowledge. We will solely enhance our personal knowledge storytelling expertise.
In case you are trying to refine the way you wrap knowledge in narrative, with construction, anecdotes, and visible enchantment, take a look at this information on crafting a powerful analyst portfolio. It presents sensible suggestions for constructing knowledge tales that truly resonate along with your viewers.
Understanding all this, we will be sure our knowledge is known the way in which we meant, which is, in reality, the one factor that issues in our job.
# Motive #1: You Assume Logic All the time Wins
It doesn’t. Folks interpret knowledge emotionally, by private narratives, and have selective consideration. The numbers gained’t converse for themselves. You need to make them converse with none ambiguity and room for interpretation.
Instance: Your chart exhibits the gross sales have dropped, however the head of gross sales dismisses it. Why? They really feel the gross sales staff labored tougher than ever. It is a basic instance of cognitive dissonance.
Repair It: Earlier than exhibiting the chart, present this takeaway: “Regardless of elevated gross sales exercise, gross sales fell 14% this quarter. That is possible as a result of diminished buyer demand.” It provides context and explicitly offers the doable cause for the gross sales decline. The gross sales staff doesn’t really feel attacked in order that they’ll settle for the chilly reality of the dropping gross sales.
# Motive #2: You Depend on the Improper Chart
A flashy chart may seize consideration, however does it actually current the information clearly and unambiguously? Visible illustration is precisely that: visible. Angles, lengths, and areas matter. In the event that they’re skewed, the interpretation will likely be skewed.
Instance: A 3D pie chart makes one funds class seem bigger than it’s, altering the perceived precedence for funding. On this instance, the gross sales slice appears the largest as a result of perspective, though it’s precisely the identical dimension because the HR slice.
Repair It: Follow utilizing chart sorts which can be simple to interpret, akin to bar, line, 2D pie chart, or scatter plot.
Within the 2D pie chart beneath, the dimensions of the funds allocation is far simpler to interpret.
Use fancy plots solely you probably have an excellent cause for it.
# Motive #3: Correlation Causation
You perceive that correlation shouldn’t be the identical as causation. After all, you do; you analyze knowledge. The identical usually doesn’t apply to your viewers, as they’re usually not that versed in arithmetic and statistics. I do know, I do know, you assume that the distinction between correlation and causation is frequent data. Belief me, it’s not: two metrics transfer collectively, and most of the people will assume one causes the opposite.
Instance: A spike in social media mentions of the model (40%) coincides with a gross sales improve (19%) in the identical week. The advertising staff doubles advert spend. However the spike was brought on by a preferred influencer’s unpaid assessment; extra spending didn’t have something to do with it.
Repair It: Label relationships clearly with “correlated,” “causal,” or “no confirmed hyperlink.”
Use experiments or extra knowledge if you wish to show causation.
# Motive #4: You Current Every part at As soon as
Individuals who work with knowledge are likely to assume that the extra knowledge they cram onto a dashboard or a report, the extra credible {and professional} it’s. It’s not. The human mind doesn’t have limitless capability to soak in info. If you happen to overload the dashboard with data, individuals will skim by, miss essential knowledge, and misunderstand the context.
Instance: You may present six KPIs without delay on one slide, e.g., buyer development, churn, acquisition price, web promoter rating (NPS), income per person, and market share.
The CEO fixated on a small dip in NPS, derailing the assembly whereas fully lacking a 13% drop in premium buyer retention, a a lot larger subject.
Repair It: Be a slide Nazi: “One slide, one chart, one major takeaway.” For the sooner instance, the takeaway might be: “Premium buyer retention fell 13% this quarter, primarily as a result of service outages.” This retains the dialogue centered on an important subject.
# Motive #5: You’re Fixated on Precision
You assume exhibiting granular breakdowns and uncooked numbers with six decimal locations is extra credible than rounding the numbers. Mainly, you assume that extra decimal locations present how complicated the calculation behind it’s. Effectively, congratulations on that complexity. Nonetheless, your viewers latches onto spherical numbers, developments, and comparisons. The sixth decimal of accuracy? Complicated. Distracting.
Instance: Your report says: “Defect price elevated from 3.267481% to three.841029%.” WTF!? Folks will get misplaced and miss the truth that the change is important.
Repair It: Around the numbers and body them. For instance, your report may say: “Defect price rose from 3.3% to three.8% — a 15% improve.” Clear and straightforward to know the change.
# Motive #6: You Use Obscure Terminology
If the terminology you utilize is obscure, or the metric names, definitions, and labels are usually not clear, you allow the door open for a number of interpretations. The incorrect one amongst these, too.
Instance: Your slide exhibits “Retention price.”
The retention of who or what? Half the staff will assume it’s buyer retention, the opposite half that it’s income retention.
Repair It: Say “buyer retention” as a substitute of simply “retention.” Be exact. Additionally, each time doable, use concise and exact definitions of the metrics you utilize, akin to: “Buyer retention = % of shoppers lively this month who have been additionally lively final month.”
You’ll keep away from confusion and in addition assist those that might know what metrics you’re speaking about, however are usually not fairly positive what it means or the way it’s calculated.
# Motive #7: You Use the Improper Context Stage
When presenting knowledge, it’s simple to overlook the context and current the information that’s overly zoomed in or zoomed out. This may distort notion; insignificant modifications might sound vital and vice versa.
Instance: You present a 10-year income pattern in a month-to-month planning assembly. Effectively, kudos for exhibiting the large image, however it hides a smaller, far more essential image: there’s a 17% drop within the final quarter.
Repair It: Zoom into the related interval, e.g., final 6 or 12 months. Then you’ll be able to say: “Right here’s the income within the final 12 months. Notice the drop in This fall.”
# Motive #8: You’re Too Centered on the Averages
Sure, the averages are nice. Typically. Nonetheless, they don’t present distribution. They cover the extremes and, thus, the story behind them.
Instance: Your report says that the common buyer spends $80 monthly. Cool story, bro. In actuality, most of your prospects spent $30-$40, that means that just a few high-spending prospects push the common up. Oh, yeah, that marketing campaign that advertising created based mostly in your report, the one focusing on the $80 prospects. Sorry, it’s not gonna work.
Repair It: All the time present distribution through the use of histograms, field plots, or percentile breakdowns. Use median as a substitute of the imply, e.g. “Median spend is $38, with 10% of shoppers spending over $190.” With that info, the advertising technique could be considerably improved.
# Motive #9: You Overcomplicate the Visuals
Too many colours, too many shapes, too many labels, and legend classes can flip your chart into an unsolvable puzzle. The visuals must be visually interesting and informative; hanging the steadiness between the 2 is sort of a murals.
Instance: Your line chart tracks 13 merchandise (that’s 13 strains!) over 12 months. Every chart has its personal coloration. By month three, nobody can observe a single pattern. On prime of that, you added knowledge labels to make the chart simpler to learn. Effectively, you failed! The info labels began resembling Jamie and Cersei Lannister — they’re disturbingly intimate.
Repair It: Simplify the charts. Present the highest three or 5 classes, group the remaining as “Different.” Present essential info solely; not all knowledge you might have deserves to be visualized. Go away one thing for later, when the customers need to drill down.
# Motive #10: You Don’t Inform What to Do
The info shouldn’t be the objective in itself. It ought to result in one thing, and that one thing is motion. You need to at all times present suggestions on the following steps based mostly in your knowledge.
Instance: You present churn has risen 14% and finish the presentation there. OK, everyone agrees the churn rise is an issue, however what must be finished with it?
Repair It: You need to pair each main perception with an actionable advice. For instance, say “Churn rose 14% this quarter, primarily in premium prospects. Suggest launching a retention supply for this group inside the subsequent month.” With this, you’ve reached the final word objective of information storytelling — making enterprise selections based mostly on knowledge.
# Conclusion
As somebody presenting knowledge, that you must be an novice psychologist generally. You need to take into consideration the individuals you current to: their background, biases, feelings, and the way they course of info.
The ten factors I talked about present you ways to do this. Attempt to implement them the following time you current your findings. You’ll see how the potential of misinterpretation decreases and your work turns into a lot simpler.
Nate Rosidi is a knowledge scientist and in product technique. He is additionally an adjunct professor instructing analytics, and is the founding father of StrataScratch, a platform serving to knowledge scientists put together for his or her interviews with actual interview questions from prime firms. Nate writes on the most recent developments within the profession market, provides interview recommendation, shares knowledge science initiatives, and covers every thing SQL.
Google Meet is introducing just a few particular choices for the Halloween season.
Customers can select from just a few new Halloween backgrounds, or generate their very own.
Meet’s new make-up results add a goth possibility.
Halloween season is a very bizarre one, and this time of 12 months, even adults can get away with embracing the vacation spirit. In case you’ve already outfitted your property with Halloween-themed good audio system and good cameras, what’s left however to unfold a few of that Halloween cheer on the workplace? At this time we’re studying about a number of the methods Google Meet is keen to assist share in these spooky vibes.
Don’t wish to miss one of the best from Android Authority?
In all probability the best method to jazz up a video name is with a contemporary background, and Meet’s bought just a few choices you’ll be able to go to there. For starters, Google is making accessible some new pre-rendered Halloween backgrounds, prepared so that you can drop proper into your subsequent Meet name. And if none of these strike your fancy, you’ll be able to all the time use Meet’s Gemini AI instruments to generate your individual Halloween backdrop.
If altering up your environment doesn’t really feel like the correct transfer for Halloween, why not get into the spirit your self? Meet is introducing a pair new choices for giving your self a Halloween-appropriate look, together with a brand new addition to these just-added digital make-up instruments, with a dark-lipstick “goth” possibility:
Stephen Schenck / Android Authority
That may very well be somewhat refined, although, and if you wish to simply take away any doubt in any respect from the minds of everybody you’re on the decision with about your Halloween bonafides, look no additional than these ghoulish filters:
Let’s simply get one factor straight right here: You’re in all probability going to have somewhat leeway for the remainder of the month in getting away with utilizing choices like these in all however probably the most conservative workplaces, however don’t go urgent your luck. As soon as November rolls round, all bets are off, and it’s again to enterprise as common.
Google says that its Meet Halloween options shall be round for a restricted time solely, and must be accessible now for Google Workspace, Google One AI Professional, and Google One AI Extremely prospects.
Thanks for being a part of our group. Learn our Remark Coverage earlier than posting.
Breakthroughs, discoveries, and DIY suggestions despatched each weekday.
Measurement issues for a telescope’s picture decision. The larger the viewing aperture, the extra mild it might probably gather. Extra mild helps reveal fainter cosmic objects, in addition to sharpen the pictures themselves.
For astronomers, one of the best outcomes normally come from sharing photos between telescopes world wide which can be linked collectively. Nevertheless, researchers from the College of California, Los Angeles (UCLA) and the Nationwide Astronomical Observatory of Japan have now demonstrated this networked method isn’t all the time essential. To acquire the sharpest-ever take a look at a distant star’s deep crimson disk of hydrogen-alpha spectral mild, all they wanted was a single telescope. As they clarify of their examine lately revealed in Astrophysical Journal Letters, this achievement relied on a fine-tuned optical fiber known as a photonic lantern.
In conventional cameras, their diffraction restrict (or the utmost quantity of element it might probably seize) is hampered by the wave nature of sunshine. A photonic lantern sidesteps these waves by first splitting the sunshine aside into particular person wavelength shapes. The workforce stated that this course of is just like separating a single musical chord into its notes. Astronomers then used the photonic lantern to additional cut up aside these mild wavefronts by shade, like a rainbow.
“This machine splits the starlight in line with its patterns of fluctuation, holding refined particulars which can be in any other case misplaced,” examine co-author Yoo Jung Kim stated in a press release. “By reassembling the measurements of the outputs, we may reconstruct a really high-resolution picture of a disk round a close-by star.”
Kim and her teammates have been initially hindered by visible noise coming from Earth’s ambiance. Much like how a sizzling, sunny day could make the horizon seem wavy, their telescope saved imaging objects as in the event that they have been wiggling. The answer’s first step got here within the type of adaptive optics. This course of consistently cancels out the atmospheric turbulence that causes these waves in actual time. Nevertheless, the workforce quickly realized that they wanted further instruments..
“Even with adaptive optics, the photonic lantern was so delicate to the wavefront fluctuations that I needed to develop a brand new information processing method to filter out the remaining atmospheric turbulence,” Kim recounted.
After making use of this filter, the workforce took an unprecedented take a look at a star within the Canis Minor constellation named beta Canis Minoris (β CMi). Positioned about 162 light-years away from Earth, β CMi is encompassed by a disk of hydrogen transferring extremely quick. Because of the Doppler impact, the speedy gasoline swirling in direction of Earth glows blue, whereas the receding gasoline glows crimson. The colour shift, in then, makes the star system’s obvious mild place strikes with the wavelengths
After utilizing their new method , the astronomers measured the star’s color-reliant imagery shifts with 5 occasions the precision of earlier observations. In doing so, in addition they realized one thing sudden: the star’s disk is lopsided. Based on Kim, it’s now as much as one other analysis division to determine why that is the case.
“We weren’t anticipating to detect an asymmetry like this,” she stated. “Will probably be a process for the astrophysicists modeling these programs to clarify its presence.”
2025 Residence of the Future Awards
Intelligent cooking instruments, distinctive home equipment, good house programs, and all the things else you’ll need in your house going ahead.
This week we have a look at a number of case research the place success on the AI entrance was not enough to guarantee long term enterprise success. Our course highlight is on:
What’s occurring within the area of Information Science, Analytics, Statistics?
AI Success, however Not Enterprise Success
Of their ebook Mining your Personal Enterprise, Jeff Deal and Gerhard Pilcher describe what I’ll name “The Case of the Climbing Churn.” A profitable predictive mannequin for figuring out probably churners was deployed for a cell phone service supplier, however the finish consequence was extra, not much less churn. Why? […]
___________________________________
WORD OF THE WEEK – Label Spreading
A typical drawback in machine studying is the “uncommon case” state of affairs, the place the category of curiosity (fraud, buy by an internet customer, dying of a affected person) is uncommon sufficient {that a} knowledge pattern might not have sufficient situations to generate helpful predictions. One technique to take care of this drawback is, in essence, knowledge fabrication: we […]
___________________________________
BOOK REVIEW – Noise
Who would have thought that a complete ebook dedicated to the bias-variance tradeoff would make it to the NY Instances enterprise finest vendor listing? The ebook is […]
To get probably the most out of this weblog, it helps to begin with an summary of machine studying rules. Start with Machine Studying Fundamentals: Parts, Utility, Sources and Extra, which supplies a stable introduction to how ML works, key parts of ML workflows, and its rising position in monetary markets.
Because the weblog makes use of real-world inventory information, familiarity with working in Python and dealing with market datasets is vital. The weblog Inventory Market Information: Acquiring Information, Visualization & Evaluation in Python is a good place to begin to grasp the best way to obtain, visualize, and put together inventory value information for modeling.
For a extra structured path, the Python for Buying and selling: Primary course on Quantra will assist newcomers construct important Python abilities in a buying and selling context, whereas Python for Buying and selling dives deeper into information dealing with and analytics for monetary purposes.
Desk of Contents
Introduction
Have you ever ever puzzled how Netflix recommends exhibits you would possibly like, or how Tesla vehicles can recognise objects on the street? These applied sciences have one thing vital in widespread – they each use the “first-principles” strategy to resolve complicated issues.
This strategy means breaking down difficult points into smaller, manageable elements and constructing options from the bottom up. Immediately, we’ll use this identical strategy to grasp machine studying classification in Python, beginning with the fundamentals.
On this beginner-friendly information, we’ll discover ways to construct a machine studying mannequin that may predict whether or not to purchase or promote a inventory. Don’t be concerned if you happen to’re new to this – we’ll clarify all the things step-by-step!
What’s Machine Studying?
In easy phrases, machine studying offers computer systems the power to study from expertise with out somebody explicitly programming each doable situation.
Take into consideration the way you realized to recognise animals as a toddler. Your dad and mom might need pointed to a canine and mentioned, “That is a canine.” After seeing many canines, you realized to establish them by your self. Machine studying works equally – we present the pc many examples, and it learns patterns from these examples.
Conventional programming tells a pc precisely what to do in each state of affairs:
IF steering wheel turns proper
THEN flip the wheels proper
Machine studying, nevertheless, exhibits the pc many examples so it could determine the patterns by itself:
Listed below are 1000 pictures of roads with obstacles
Listed below are 1000 pictures of clear roads
Now, inform me if this new picture exhibits a transparent street or has obstacles
This strategy is being utilized in all the things from self-driving vehicles to inventory market buying and selling.
Understanding Classification in Machine Studying
Classification is without doubt one of the most typical duties in machine studying. It is about placing issues into classes based mostly on their options.
Think about instructing a toddler about animals:
You present them an image of a cat and say, “This can be a cat”
You present them an image of a canine and say, “This can be a canine”
After displaying many examples, you take a look at them by displaying a brand new image and asking, “What animal is that this?”
Machine studying classification works the identical means:
We give the mannequin examples with identified classes (coaching information)
The mannequin learns patterns from these examples
We take a look at the mannequin by asking it to categorise new examples it hasn’t seen earlier than
In buying and selling, we would use classification to foretell whether or not a inventory value will go up or down tomorrow based mostly on as we speak’s market info.
Varieties of Classification Issues
Earlier than diving into our Python instance, let’s rapidly perceive the principle sorts of classification issues:
Binary Classification: Solely two doable classes
Instance: Will the inventory value go up or down?
Instance: Is that this electronic mail spam or not?
Multi-class Classification: Greater than two classes
Instance: Ought to we purchase, maintain, or promote this inventory?
Instance: Is that this picture a cat, canine, or hen?
Imbalanced Classification: When one class seems rather more incessantly than the others
Instance: Predicting uncommon occasions like market crashes
Instance: Detecting fraud in banking transactions (most transactions are authentic)
Our instance under will give attention to binary classification (predicting whether or not the S&P 500 index will go up or down the subsequent day).
Constructing a Classification Mannequin in Python: Step-by-Step
Let’s construct a easy classification mannequin to foretell whether or not the S&P 500 value will improve or lower the subsequent buying and selling day.
Step 1: Import the Required Libraries
First, we have to import the Python libraries that can assist us construct our mannequin:
These libraries give us the instruments we want with out having to code all the things from scratch.
Step 2: Get Your Information
We’ll obtain S&P 500 information utilizing the yfinance library:
This code downloads 5 years of S&P 500 ETF (SPY) information and plots the closing value.
Determine: Shut Costs Plot for SPY
Step 3: Outline What You Need to Predict
That is our “goal variable” – what we’re asking the mannequin to foretell. On this case, we wish to predict whether or not tomorrow’s closing value can be greater or decrease than as we speak’s:
Step 4: Select Your Prediction Options
These are the clues we give our mannequin to make predictions. Whereas we may use many various indicators, we’ll hold it easy with two fundamental options:
Step 5: Break up Information into Coaching and Testing Units
We have to divide our information into two elements:
Coaching information: Used to show the mannequin
Testing information: Used to guage how nicely the mannequin realized
That is like finding out for a take a look at: you study out of your research supplies (coaching information), then take a look at your data with new questions (testing information).
Step 6: Prepare Your Mannequin
Now we’ll create and prepare our mannequin utilizing the Assist Vector Classifier (SVC):
This single line of code does loads of work behind the scenes! It creates a Assist Vector Classifier and trains it on our coaching information.
Step 7: Examine How Effectively Your Mannequin Performs
We have to verify if our mannequin has realized successfully:
Output:
Prepare Accuracy: 54.98%
Take a look at Accuracy: 58.33%
Fig: Accuracy Scores for Prepare and Take a look at Interval
An accuracy above 50% on take a look at information suggests our mannequin is healthier than random guessing.
Step 8: Make Predictions
Now let’s use our mannequin to make predictions and calculate potential returns:
This calculates how a lot cash we’d make or lose by following our mannequin’s predictions.
Step 9: Visualise Your Outcomes
Lastly, let’s plot the cumulative returns of our technique to see the way it performs:
This exhibits the overall share return of our technique over time.
Conclusion
Congratulations! You’ve got simply constructed a easy machine studying classification mannequin that predicts inventory market actions. Whereas this instance used the S&P 500, you might apply the identical strategy to any tradable asset.
Keep in mind, that is simply a place to begin. To enhance your mannequin, you might:
Add extra options (like technical indicators)
Strive totally different classification algorithms
Use extra information or totally different time intervals
Add threat administration guidelines
The important thing to success in machine studying is experimentation and refinement. Strive altering totally different elements of the code to see the way it impacts your mannequin’s efficiency.
Completely happy studying and buying and selling!
Be aware: All investments and buying and selling within the inventory market contain threat. This text is for instructional functions solely and shouldn’t be thought-about monetary recommendation. All the time do your individual analysis and take into account consulting with a monetary skilled earlier than making funding choices.
Subsequent Steps
After constructing your first classification mannequin, you’ll be able to increase your abilities by exploring extra superior ML strategies and integrating them into end-to-end buying and selling workflows.
To check your methods successfully, studying the best way to backtest is essential. The weblog Backtesting: Find out how to Backtest, Technique, Evaluation, and Extra introduces key ideas like historic information testing, efficiency metrics, and threat analysis—important for assessing any machine learning-based technique.
For a hands-on studying expertise, you’ll be able to discover the Buying and selling with Machine Studying: Classification and SVM course on Quantra, which takes your classification data additional and teaches the best way to apply fashions in reside monetary situations.
Should you’re aiming for a complete, career-oriented studying path, the Govt Programme in Algorithmic Buying and selling (EPAT) is extremely really useful. EPAT covers Python programming, machine studying, backtesting, and mannequin analysis, with real-world buying and selling purposes and business mentorship—supreme for professionals severe about algorithmic buying and selling.
Be aware: The unique publish has been revamped on 27th Could 2025 for recentness, and accuracy.
Disclaimer: All investments and buying and selling within the inventory market contain threat. Any resolution to position trades within the monetary markets, together with buying and selling in inventory or choices or different monetary devices is a private resolution that ought to solely be made after thorough analysis, together with a private threat and monetary evaluation and the engagement {of professional} help to the extent you consider needed. The buying and selling methods or associated info talked about on this article is for informational functions solely.
House » Weblog » Operating SmolVLM Regionally in Your Browser with Transformers.js
In our earlier two tutorials:
We mentioned SmolVLM (variations 1 and a couple of) in depth. We explored its structure, coaching course of, benchmarks, and extra. We additionally demonstrated multi-image understanding duties utilizing the SmolVLM2 mannequin and constructed a Gradio interface to generate spotlight reels from long-duration movies.
Now, we’re taking the following step: operating the SmolVLM mannequin immediately within the browser utilizing Transformers.js, Subsequent.js, and Tailwind CSS. This tutorial will information you step-by-step, with an in depth breakdown of each line of code and the reasoning behind it.
By the tip, you should have a browser-based multimodal chatbot that understands pictures and textual content concurrently, all operating domestically with no backend.
To discover ways to run the SmolVLM mannequin in your browser, simply hold studying.
Would you want fast entry to three,457 pictures curated and labeled with hand gestures to coach, discover, and experiment with … free of charge? Head over to Roboflow and get a free account to seize these hand gesture pictures.
Want Assist Configuring Your Growth Atmosphere?
Having bother configuring your improvement surroundings? Need entry to pre-configured Jupyter Notebooks operating on Google Colab? Remember to be part of PyImageSearch College — you can be up and operating with this tutorial in a matter of minutes.
All that stated, are you:
Quick on time?
Studying in your employer’s administratively locked system?
Desirous to skip the trouble of combating with the command line, bundle managers, and digital environments?
Able to run the code instantly in your Home windows, macOS, or Linux system?
Achieve entry to Jupyter Notebooks for this tutorial and different PyImageSearch guides pre-configured to run on Google Colab’s ecosystem proper in your internet browser! No set up required.
And better of all, these Jupyter Notebooks will run on Home windows, macOS, and Linux!
We’ll construct a browser-based chat interface powered by the SmolVLM, a small but environment friendly vision-language mannequin launched by HuggingFace. As soon as it’s operating, customers can:
Add a number of pictures
Sort questions on these pictures
Get real-time solutions from the SmolVLM mannequin
Determine 1: Multimodal Chatbot Launch Web page (supply: picture by the creator)
The key sauce is Transformers.js mixed with WebGPU: Transformers.js lets us load and run Hugging Face fashions in JavaScript, and WebGPU offers us the GPU acceleration we want for quick inference. That mixture brings three fast benefits:
Zero Server Value: the mannequin runs client-side, so that you don’t want a backend
Privateness by Design: pictures and textual content keep on the person’s system
Actual-Time Interactivity: outputs can stream immediately into the chat UI for a easy expertise
For the UI and app construction, we use Subsequent.js and Tailwind CSS for speedy, responsive styling. Architecturally, the app facilities on a major web page (the UI), a Net Employee that runs the mannequin off the principle thread, and a handful of small utility elements for chat bubbles, picture previews, progress indicators, and extra.
Earlier than we dive into the code, let’s perceive the 2 major constructing blocks briefly — SmolVLM and Transformers.js — so you recognize why this strategy works and the place its limits are.
SmolVLM is designed to be light-weight and sensible. Not like enormous multimodal fashions that require server-class GPUs, SmolVLM trades parameter rely for effectivity, enabling it to run in memory-constrained environments (e.g., the browser). Key design targets are:
Fewer Parameters: so the mannequin suits gadgets with restricted RAM,
Optimized Structure: that balances accuracy and pace, and
Actual-World Utility: for duties reminiscent of picture captioning, Visible Query Answering (VQA), and doc understanding.
In follow, SmolVLM accepts pictures + textual content as inputs and returns textual outputs that replicate its visible understanding. As a result of the mannequin is deliberately compact, it turns into an amazing candidate for on-device inference the place privateness and responsiveness matter.
Transformers.js is the JavaScript counterpart of the Hugging Face Transformers Python library. It brings mannequin loading and inference to browsers, and helps a number of execution backends:
WebGPU: leverages fashionable GPUs immediately from the browser for accelerated inference
WebGL: GPU acceleration fallback for gadgets that don’t assist WebGPU
WASM (WebAssembly): CPU execution, slower, however works virtually in all places
Essential options that make Transformers.js superb for this challenge:
Hub integration: load fashions immediately from the Hugging Face Hub, just like the Python transformers API
Multimodal Assist: processors and fashions that settle for each pictures and textual content
Streaming Era: token-by-token callbacks let the UI present partial outputs as they arrive, yielding a real-time chat expertise
Put SmolVLM and Transformers.js collectively and also you get a sensible, personal, serverless option to run multimodal AI within the browser. The primary advantages are apparent: low value, robust privateness, and nice UX. The trade-offs are additionally vital to acknowledge:
Mannequin Measurement Limits: very massive fashions nonetheless received’t match comfortably in most browsers; SmolVLM is sufficiently small to make this attainable.
System Variability: efficiency relies upon closely on the person’s system and whether or not it helps WebGPU.
Inference-Solely: we’re doing inference within the browser; coaching or heavy fine-tuning nonetheless requires devoted servers.
Earlier than we begin constructing, let’s arrange the event surroundings. You’ll want Node.js (and some associated instruments) to run our challenge.
Node.js: A JavaScript runtime that permits us to run JavaScript outdoors the browser. Required for Subsequent.js improvement.
npm (Node Package deal Supervisor): Comes bundled with Node.js. It manages dependencies (putting in, updating, and eradicating libraries).
nvm (Node Model Supervisor): Helps handle a number of variations of Node.js on the identical machine. Helpful in case your initiatives want completely different variations.
npx: A bundle runner that comes with npm. It permits you to run instructions immediately from npm with out globally putting in the bundle (e.g., npx create-next-app).
To put in Node.js in your system, open your terminal and run:
# Obtain and set up nvm:
curl -o- https://uncooked.githubusercontent.com/nvm-sh/nvm/v0.40.3/set up.sh | bash

# in lieu of restarting the shell
. "$HOME/.nvm/nvm.sh"

# Obtain and set up Node.js:
nvm set up 22

# Confirm the Node.js model:
node -v # Ought to print "v22.19.0".

# Confirm npm model:
npm -v # Ought to print "10.9.3".
Right here’s what we did:
Put in nvm, which manages Node.js variations (Line 2)
Loaded nvm into the present shell session (Line 5)
Put in Node.js v22, which mechanically comes with npm(Line 8)
Verified that each Node.js and npm are working (Strains 11 and 14)
For Home windows, obtain the installer immediately from the Node.js official web site. It will set up each Node.js and npm. If you happen to want model administration like nvm, you should use nvm-windows.
Now that Node.js is put in, let’s create a brand new Subsequent.js challenge:
npx create-next-app@newest
Right here:
npx: downloads and runs the bundle immediately with out putting in it globally.
create-next-app: bootstraps a full Subsequent.js challenge with all mandatory configuration.
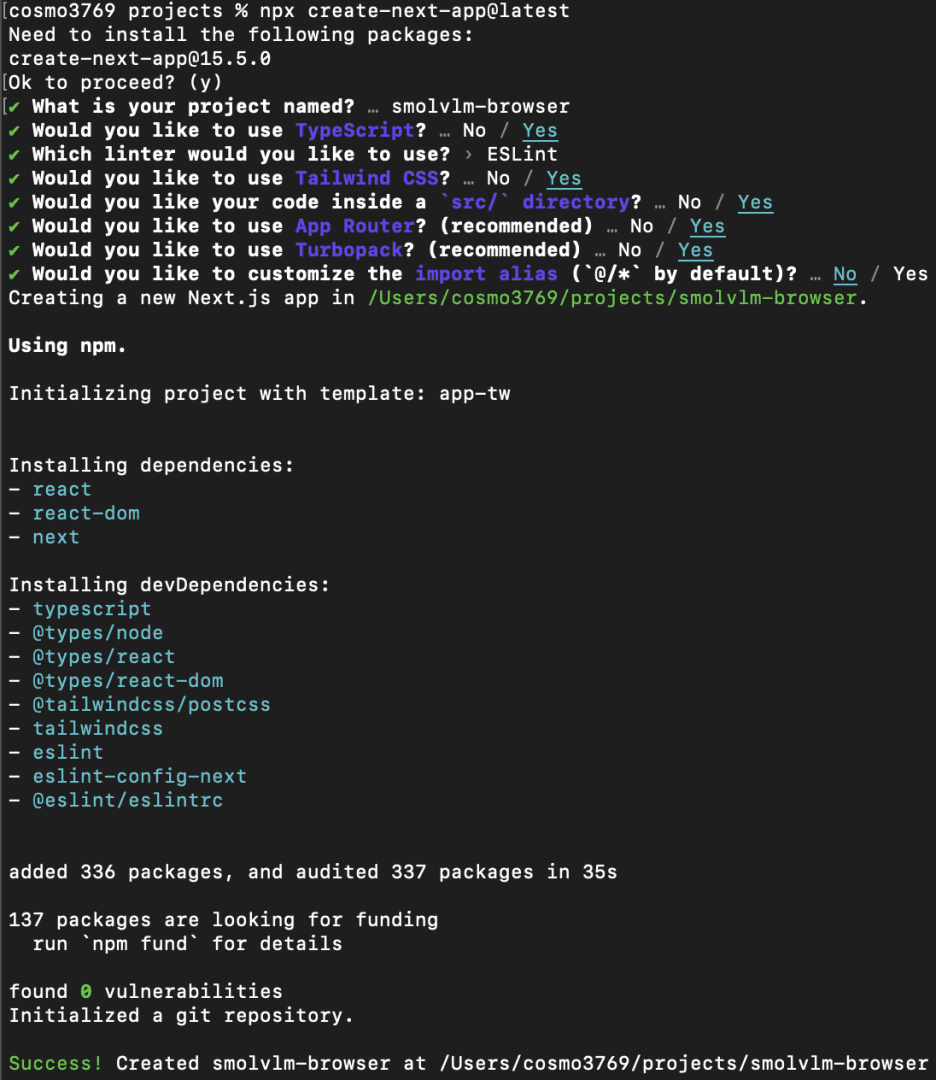
Once we run this, the CLI will immediate us with just a few configuration questions. Under is the precise setup we’ll use:
What’s your challenge named? → smolvlm-browser
Would you want to make use of TypeScript? → Sure (TypeScript offers kind security and a greater improvement expertise).
Which linter would you want to make use of? → ESLint (default and broadly supported).
Would you want to make use of Tailwind CSS? → Sure (we’ll use Tailwind for fast, utility-first styling).
Would you want your code inside a src/ listing? → Sure (retains the challenge construction clear and scalable).
Would you want to make use of App Router? (really helpful) → Sure (Subsequent.js 13+ App Router is the trendy option to construct apps).
Would you want to make use of Turbopack? (really helpful) → Sure (Subsequent.js’s quick bundler, superb for improvement).
Would you prefer to customise the import alias (@/* by default)? → No (we’ll follow the default @/* which already works nicely).
Determine 2: Subsequent.js challenge set up within the CLI (supply: picture by the creator)
As soon as we affirm these choices, Subsequent.js will mechanically generate the challenge with the required setup. After set up, we will transfer into the challenge folder:
cd smolvlm-browser
npm run dev
Our Subsequent.js improvement server ought to now be operating at http://localhost:3000.
Earlier than shifting on to the Undertaking Construction, let’s set up just a few required libraries. We set up it utilizing the command npm i .
@huggingface/transformers
That is the core library for operating Hugging Face fashions in JavaScript/TypeScript. It offers entry to AutoProcessor, AutoModelForVision2Seq, and streaming textual content technology.
In our challenge, it powers the SmolVLM mannequin, handles picture and textual content inputs, and manages mannequin inference within the browser through WebGPU.
better-react-mathjax
This library permits rendering mathematical formulation in React utilizing MathJax. Helpful if we need to show LaTeX or complicated math within the chat interface or any part. It ensures formulation are protected, responsive, and high-quality within the UI.
dompurify
A library to sanitize HTML and forestall XSS assaults. When displaying user-generated content material or parsed Markdown (like from marked), dompurify ensures that no malicious HTML or scripts are executed within the browser.
framer-motion
A React animation library for easy UI transitions. It may be used to animate chat messages, hover results, and buttons, making the interface really feel extra interactive and responsive.
marked
A quick Markdown parser. Converts Markdown textual content to HTML, enabling your app to render formatted messages or user-entered content material. Works hand in hand with dompurify to make sure security when rendering HTML from Markdown.
With the Subsequent.js boilerplate prepared and libraries put in, we’re all set to start out integrating Transformers.js and the SmolVLM mannequin.
After creating the Subsequent.js boilerplate and putting in the required libraries, right here’s how we’ll arrange our information for constructing the browser-based multimodal chatbot with Transformers.js and SmolVLM:
public/
 brand.png               # App brand

src/
 app/
   web page.tsx             # Fundamental utility UI
   employee.ts            # Net Employee that masses and runs the mannequin

 icons/
   ArrowRightIcon.tsx   # Ship message button
   CrossIcon.tsx        # Take away/shut button
   ImageIcon.tsx        # Add picture button
   StopIcon.tsx         # Cease/interrupt button

 utilities/
   Chat.tsx             # Chat interface (messages, person & mannequin bubbles)
   ImagePreview.tsx     # Picture preview with delete possibility
   Progress.tsx         # Progress bar for mannequin loading state
   sorts.ts             # TypeScript kind definitions
   utils.tsx            # Helper features (small utilities)
This file is the single-page React consumer that builds the UI, manages person enter (textual content + pictures), communicates with the net employee that runs the mannequin, reveals progress, and renders the chat.
"use consumer";

import { useEffect, useState, useRef } from "react";
import Chat from "@/utilities/Chat";
import ArrowRightIcon from "@/icons/ArrowRightIcon";
import StopIcon from "@/icons/StopIcon";
import Progress from "@/utilities/Progress";
import ImageIcon from "@/icons/ImageIcon";
import ImagePreview from "@/utilities/ImagePreview";
import kind { Message, MessageContent } from "@/utilities/sorts";

const STICKY_SCROLL_THRESHOLD = 120;
We begin with "use consumer" to mark this file as a Subsequent.js consumer part. That ensures this code runs within the browser (not on the server). That is required as a result of we depend on browser-only APIs (navigator, Employee, DOM refs).
Subsequent, we outline commonplace React hooks — useEffect, useState, and useRef
useRef is later used for the Employee occasion and DOM references (textarea, chat container).
useState holds the reactive variables (standing, messages, pictures).
useEffect units up unwanted side effects (employee lifecycle, window resize, and so on.).
We additionally import UI elements and icons (Chat, Progress, ImagePreview, icons). Importing sorts (Message, MessageContent) offers kind security in TypeScript.
STICKY_SCROLL_THRESHOLD is a numeric fixed used when auto-scrolling the chat to the underside — it determines whether or not to “stick” to the underside (so the person studying older messages isn’t all of the sudden pressured down).
Line 14 defines the App() perform, which serves because the utility’s start line.
employee: Holds the Net Employee occasion so we will publish messages and obtain occasions. Storing it in a ref ensures the employee isn’t recreated on each re-render.
DOM refs (textareaRef, chatContainerRef, imageUploadRef): Allow us to immediately manipulate DOM components — for instance, auto-resizing the textarea, auto-scrolling the chat container, and triggering the file enter for picture uploads.
gpuSupported: Begins as null till we detect WebGPU availability. As soon as resolved to true or false, it helps render SSR-safe placeholders to keep away from mismatches between server and consumer.
standing: Tracks the model-loading section:
null: preliminary state (present “Load mannequin” button)
"loading": mannequin information are being downloaded and initialized
"prepared" mannequin is totally loaded and interactive
error: Shops error messages (if the employee stories failures), and shows them within the UI.
loadingMessage: Holds pleasant standing messages (e.g., “Downloading weights…”) proven alongside the progress bar throughout loading.
progressItems: An array of objects used to render particular person progress bars for every mannequin file being downloaded by the employee.
isThinking / isStreaming: Symbolize two levels of assistant response:
isThinking: Earlier than the primary token arrives (the assistant is making ready a solution).
isStreaming: As soon as tokens begin arriving (the assistant is outputting the response).
messages, pictures, enter: Retailer the chat dialog historical past, uploaded pictures (as information distinctive useful resource identifiers (URIs)), and the person’s present enter textual content.
tps / numTokens: Metrics acquired from the employee throughout streaming, representing tokens per second and complete tokens generated.
Collectively, these states and refs kind the spine of the chat app, enabling it to handle person enter, render messages, stream mannequin outputs, and deal with real-time progress and error reporting.
// detect WebGPU solely on consumer
 useEffect(() => {
   if (typeof navigator !== "undefined" && "gpu" in navigator) {
     setGpuSupported(true);
   } else {
     setGpuSupported(false);
   }
 }, []);
Subsequent, we arrange a useEffect hook to detect WebGPU assist within the person’s browser:
useEffect: Runs solely on the consumer facet, not throughout server-side rendering (SSR).
typeof navigator !== "undefined": Ensures we’re operating in a browser (not on the server).
"gpu" in navigator: Checks whether or not the browser helps the navigator.gpu API required for WebGPU inference.
If supported, set gpuSupported to true; in any other case, set it to false.
The empty dependency array [] ensures this impact runs as soon as on mount.
This step is vital as a result of our app could run in environments with out WebGPU assist. We use this flag later to determine whether or not to load the mannequin or present a fallback/error message.
Subsequent, we outline the onEnter perform. This perform is triggered at any time when the person submits a message (urgent Enter or clicking the ship button):
Parameters
message: the textual content typed by the person.
pictures: an array of uploaded picture information (information URIs).
Step 1: Assemble content material
Every picture is wrapped in an object: { kind: "picture", picture }.
The person’s textual content is wrapped as { kind: "textual content", textual content: message }.
Collectively, these kind the MessageContent[] array for one chat flip.
Step 2: Replace Chat Historical past
setMessages((prev) => [...prev, { role: "user", content }]) appends the brand new person message (with pictures and textual content) to the dialog state.
Step 3: Reset Helper States
setTps(null): Clears tokens-per-second metrics earlier than the assistant replies.
setInput(""): Clears the textual content enter field.
setImages([]): Clears the staged picture previews (since they’re now a part of the chat).
Briefly, onEnter takes the person’s enter (textual content + pictures), codecs it right into a unified message object, appends it to the chat historical past, and resets the UI so the person can proceed chatting seamlessly.
Subsequent, we outline the onInterrupt perform. This perform permits the person to cease the assistant mid-response if wanted:
Objective: Typically, the assistant may generate a really lengthy response. As a substitute of ready, the person can click on the “Cease” button.
Step 1: Examine for Employee
We first confirm that employee.present exists (that means the Net Employee is operating).
Step 2: Ship Interrupt Sign
We name employee.present.postMessage({ kind: "interrupt" }).
Sends a message to the employee thread to cease producing additional tokens.
The employee operating the SmolVLM mannequin listens for this "interrupt" message. As soon as acquired, it halts the inference course of instantly, giving management again to the person.
We additionally outline a helper perform resizeInput to make the chat enter field mechanically increase and shrink based mostly on the textual content size:
Step 1: Guard Clause
If textareaRef.present is null (not but mounted), we return.
Step 2: Reset Peak
We briefly set the peak to "auto". This clears the present top, permitting the browser to recalculate the textual content’s pure top.
Step 3: Calculate the New Peak
goal.scrollHeight offers the total top wanted to suit the textual content.
We clamp this between 24px (minimal) and 200px (most) utilizing Math.max and Math.min.
This prevents the field from turning into too small or taking over the entire display.
Step 4: Apply New Peak
We assign the calculated top again to goal.model.top.
 useEffect(() => {
   resizeInput();
 }, [input]);
Lastly, we tie this perform to React’s state updates:
This ensures that at any time when the enter state adjustments (at any time when the person sorts or deletes textual content), the enter field resizes mechanically to suit the content material.
Briefly, this perform offers the chatbox a dynamic top — all the time tall sufficient to suit the textual content however capped at a user-friendly measurement.
Now, beneath useEffect, we examine if a employee already exists. employee is saved in a useRef, so it persists throughout renders with out reinitializing. This prevents a number of staff from being created on each re-render.
new Employee(...) spins up a Net Employee. new URL("./employee.ts", import.meta.url) is Vite/webpack’s option to bundle and find the employee file accurately. { kind: "module" } tells the browser this employee is an ES module (so you should use import inside employee.ts).
This employee runs in a separate thread — it received’t block the UI whereas the mannequin masses or generates tokens.
Instantly sends a "examine" message to the employee.
This acts like a handshake:
Confirms the employee began efficiently.
Let the employee reply to show communication works.
The onMessageReceived perform listens for messages from the Net Employee (employee.ts). Every message features a standing discipline consisting of the employee stage. Primarily based on that, we replace React state to replicate progress, streaming, or errors.
Breakdown of swap (e.information.standing)
"loading"
The Employee says the mannequin is loading.
setStatus("loading"): updates UI to indicate loading state.
setLoadingMessage(e.information.information): show what’s being loaded (e.g., mannequin weights).
"provoke"
The Employee begins downloading a brand new file.
We add that file to progressItems so the progress bar reveals up.
"progress"
Employee stories partial obtain progress.
We replace the matching file’s progress in progressItems.
"carried out"
File completed downloading.
Take away it from progressItems.
"prepared"
The Employee completed establishing and is prepared for inference.
setStatus("prepared"): The UI reveals that the mannequin is able to use.
"begin"
The Employee began producing a solution.
setIsThinking(true): assistant is “making ready to answer.”
React’s useEffect requires cleanup to forestall reminiscence leaks and duplicate listeners.
Take away employee listeners (message, error): Ensures we don’t accumulate a number of message/error listeners throughout re-renders.
Take away window resize listener (resize): Avoids duplicate resize handlers after part re-renders or unmounts.
 // Set off technology on new messages
 useEffect(() => {
   if (messages.filter((x) => x.function === "person").size === 0) return;
   if (messages.at(-1)?.function === "assistant") return;
   if (employee.present) employee.present.postMessage({ kind: "generate", information: messages });
 }, [messages]);
This useEffectset offs mannequin inference (technology) at any time when a brand new person message is added.
Examine if there are any person messages (Line 168)
If no person messages exist but, we skip.
Prevents operating technology at app startup.
Examine if the final message is already from the assistant (Line 169)
If the newest message is from the assistant, it means the mannequin is already producing or has completed responding.
Avoids sending a number of duplicate requests.
Ship a generate request to the employee (Line 170)
Posts a message to the Net Employee.
kind = "generate" tells the employee: “Run inference based mostly on the present dialog.”
information = messages offers the complete dialog historical past (person + assistant).
That is key: fashions often want the total chat historical past to generate coherent responses, not simply the most recent query.
Dependency array (Line 171)
This impact re-runs solely when messageschange.
Which means: each time the person sends a brand new message → we set off mannequin technology.
This block displays messages, and at any time when the person provides a brand new one, it mechanically alerts the employee to begin producing a response.
This ensures the chat window auto-scrolls to the underside whereas the assistant is “considering” or “streaming” a response — just like how ChatGPT or messaging apps behave.
Guard clause (Line 174)
Do nothing if the chat container is lacking (e.g., earlier than render).
Do nothing if the assistant is idle — we solely scroll whereas producing.
Entry the chat container (Line 175)
Examine if the person is “close to the underside” (Strains 177 and 178)
scrollHeight: complete scrollable top.
scrollTop: how far the person has scrolled from the highest.
clientHeight: seen top of the container.
If the distinction (how removed from the underside) is smaller than the edge → we assume the person needs to remain pinned on the backside.
Scroll to the backside (Line 180)
Forces the chat to stay on the most recent message.
Dependencies (Line 182)
Re-run at any time when new messages arrive or assistant state adjustments.
Legitimate enter examine (Line 184)
A boolean flag used to allow or disable the “Ship” button.
Enter is legitimate if the person has both:
Typed some textual content (enter.size > 0), or
Uploaded no less than one picture (pictures.size > 0).
This prevents sending empty messages.
Collectively, these two elements hold the chat expertise easy (auto-scroll) and make sure that person enter is legitimate earlier than sending.
When the app first masses, it doesn’t but know whether or not WebGPU is supported, so gpuSupported begins as null. This block shows a impartial loading display (centered textual content with a light- or dark-aware background) till detection completes.
In Subsequent.js, elements are rendered on the server first. As a result of navigator.gpu doesn’t exist on the server, we wait till client-side hydration to examine it. Initializing with null avoids hydration mismatches and offers a secure placeholder.
if (!gpuSupported) {
   return (

       WebGPU is just not supported on this browser.

   );
 }
If the examine determines that gpuSupported === false, the app halts execution. As a substitute of operating the mannequin (which might crash or fail), it shows a full-screen warning stating, “WebGPU is just not supported on this browser.”
// Regular App format
return (
{/* Sidebar */}
This block handles two attainable outcomes after the loading section.
First, if the standing is "prepared", it means the mannequin has completed loading efficiently. In that case, a affirmation message is displayed within the sidebar — “Mannequin Loaded Efficiently… ✅” — to obviously inform the person that the system is prepared to be used.
Second, if there’s any problem throughout loading or inference, the error variable will comprise an error message. When the error is just not null, a purple error message is proven as an alternative, alerting the person that one thing went fallacious.
Collectively, these circumstances present clear suggestions about whether or not the mannequin is able to run or if an issue occurred.
{/* Fundamental Chat */}
The container serves because the central space the place conversations happen. Inside it, there’s a scrollable
that makes use of the chatContainerRef reference. This ref permits the code to regulate scrolling (e.g., mechanically preserving the view pinned to the most recent messages when new ones seem).
Inside that scrollable space, the part is rendered. This part receives three props:
messages: the checklist of all person and assistant messages.
isThinking: signifies whether or not the assistant is presently making ready a response (earlier than tokens start streaming in).
isStreaming: whether or not the assistant is actively producing output tokens.
Briefly, this part shows the dialog historical past and updates it dynamically because the assistant processes or streams new messages.
{/* Enter Bar */}
{/* Picture add button */}
{/* Textarea */}
This block implements the enter bar, the place customers work together with the assistant by importing pictures or typing messages.
First, there’s the picture add button. It’s styled as an icon inside a label, which, when clicked, opens the file picker. The hidden permits customers to pick a number of pictures. Every file is learn utilizing a FileReader, transformed right into a Information URI, and saved within the pictures state through setImages. This lets the chat show and ship pictures together with textual content messages.
Subsequent is the textarea enter discipline, referenced by textareaRef. It’s the place customers kind their prompts. The worth is sure to the enter state, so adjustments are tracked in actual time. The enter is disabled till the mannequin is totally loaded (standing === "prepared"). A key handler ensures that urgent Enter (with out Shift) sends the message through onEnter, whereas Shift+Enter permits multi-line enter.
Briefly, this half handles person enter assortment — choosing pictures and typing messages — and prepares them for sending to the assistant.
This block finalizes the enter part with two key elements: the ship/cease button and the picture preview checklist.
The ship/cease button adjustments dynamically based mostly on the assistant’s state. If isStreaming is true (that means the assistant is presently producing a response), a purple cease button is proven. Clicking it calls onInterrupt, which sends an interrupt message to the employee, stopping the response. In any other case, when isStreaming is false, a blue ship button seems. This button is disabled until validInput (textual content or pictures are current). When clicked, it triggers onEnter(enter, pictures), submitting the person’s message and connected pictures to the chat.
Under the button, if any pictures are staged (pictures.size > 0), an picture preview checklist is displayed. Every preview is rendered utilizing the ImagePreview part, displaying a small thumbnail. Subsequent to every picture is a take away possibility that updates the pictures state by filtering out the deleted merchandise. This permits customers to assessment and handle uploaded pictures earlier than sending them.
Altogether, this half handles sending messages, interrupting responses, and managing connected pictures, making the chat interface interactive and user-friendly.
It runs the heavy Transformers.js code in a separate thread so the UI stays responsive. It masses the processor and mannequin, handles mannequin technology, streams tokens again to the principle thread, and responds to regulate messages (examine, load, generate, interrupt, reset).
This block imports the core utilities required from Transformers.js.
AutoProcessor: preprocesses inputs (textual content and pictures) into the proper format understood by the mannequin.
AutoModelForVision2Seq: masses SmolVLM, which is a vision-to-text (vision-language) mannequin.
TextStreamer: streams tokens from the mannequin in actual time so responses seem as they're generated.
InterruptableStoppingCriteria: permits technology to cease halfway when the person clicks the cease button.
load_image: converts pictures into tensors appropriate for the mannequin.
We additionally set MAX_NEW_TOKENS = 1024, which serves as a technology cap — stopping the mannequin from producing excessively lengthy responses.
let fp16_supported = false;
async perform examine() {
strive {
const adapter = await (navigator as any).gpu.requestAdapter();
if (!adapter) {
throw new Error("WebGPU is just not supported (no adapter discovered)");
}
fp16_supported = adapter.options.has("shader-f16");
} catch (e) {
self.postMessage({
standing: "error",
information: String(e),
});
}
}
We outline a flag, fp16_supported, to trace whether or not the browser helps 16-bit floating-point (FP16) precision on the GPU. Operating fashions in FP16 is each extra memory-efficient and sooner, making this examine beneficial.
The examine perform runs asynchronously. It requests a GPU adapter from the browser’s WebGPU API. If no adapter is discovered, WebGPU isn’t out there, and an error is thrown.
If the adapter exists, the perform checks whether or not it helps the shader-f16 characteristic, which signifies that the GPU can deal with FP16 operations. The result's saved in fp16_supported.
If an error happens at any step, the perform sends a message again to the principle thread (self.postMessage) with standing: "error" and the error string so the UI can show it.
This SmolVLM class is a straightforward wrapper round loading the processor and mannequin for the SmolVLM-256M-Instruct checkpoint from Hugging Face, and it makes use of WebGPU for inference within the browser.
Right here’s what’s taking place:
Static Properties
model_id is mounted to "HuggingFaceTB/SmolVLM-256M-Instruct", the mannequin you’re loading.
processor and mannequin are declared as static, so they're shared throughout all calls. As soon as loaded, they’ll keep cached in reminiscence.
getInstanceTechnique
That is an async methodology that initializes and returns each the processor and the mannequin.
It makes use of the nullish coalescing project (??=) operator to make sure that the processor and mannequin are solely created as soon as. In the event that they’re already initialized, the prevailing ones are reused.
Processor
Created with AutoProcessor.from_pretrained, which masses the pre/post-processing logic (e.g., tokenization, picture transforms).
Accepts a progress_callback to replace UI whereas loading.
Mannequin
Created with AutoModelForVision2Seq.from_pretrained.
It’s explicitly set to dtype: "fp32" (32-bit floating level) and system: "webgpu", so it runs within the browser utilizing WebGPU.
The identical progress_callback is handed right here as nicely.
Return Worth
Returns each processor and mannequin collectively as a Promise.all, so the caller can destructure them as soon as they’re prepared.
This construction makes it straightforward to load the mannequin solely as soon as and reuse it all through your app. Later, if you happen to detect fp16_supported (out of your earlier employee examine), you may exchange dtype: "fp32" with "fp16" for sooner inference.
const stopping_criteria = new InterruptableStoppingCriteria();
let past_key_values_cache = null;
interface Message {
content material: any;
}
stopping_criteria
Creates a brand new occasion of InterruptableStoppingCriteria().
Used when producing textual content with Hugging Face fashions. It lets you interrupt technology midstream (e.g., if the person cancels or a cease situation is met).
past_key_values_cache
Initialized as null. It will later retailer cached consideration key/worth tensors from the mannequin’s earlier ahead move.
By reusing this cache, you may pace up textual content technology because the mannequin doesn’t have to recompute previous states every time — it solely processes the brand new tokens.
MessageInterface
A TypeScript interface with a single discipline:
async perform generate(messages: Message[]) {
// For this demo, we solely reply to the final message
messages = messages.slice(-1);
// Retrieve the text-generation pipeline.
const [processor, model] = await SmolVLM.getInstance();
// Load all pictures
const pictures = await Promise.all(
messages
.map((x) => x.content material)
.flat(Infinity)
.filter((msg) => msg.picture !== undefined)
.map((msg) => load_image(msg.picture)),
);
Line 54 defines an asynchronous perform to generate the assistant’s response and takes an array of Message objects as enter. For simplicity, this demo processes solely the most up-to-date message — slice(-1) retains solely the final ingredient of the array (Line 56).
Retrieve mannequin and processor (Line 59)
Calls the getInstance() methodology of the SmolVLM class. Returns the processor (for making ready pictures and textual content) and the mannequin (for producing responses).
Utilizing await ensures the mannequin and processor are totally loaded earlier than persevering with.
Load all pictures from the messages (Strains 62-68)
messages.map(x => x.content material) extracts the content material arrays from every message.
.flat(Infinity) flattens nested arrays of content material.
.filter(msg => msg.picture !== undefined) retains solely content material objects which have a picture.
.map(msg => load_image(msg.picture)) converts every picture URI into an picture object that the mannequin can course of.
Promise.all(...) ensures all pictures are loaded asynchronously earlier than continuing.
This block prepares the newest person message and masses all its related pictures so the mannequin can generate a response.
// Put together inputs
const textual content = processor.apply_chat_template(messages, {
add_generation_prompt: true,
});
const inputs = await processor(textual content, pictures, {
// Set `do_image_splitting: true` to separate pictures into a number of patches.
// NOTE: This makes use of extra reminiscence, however can present extra correct outcomes.
// do_image_splitting: false,
});
let startTime;
let numTokens = 0;
let tps: quantity | undefined;
const token_callback_function = (tokens: any) => {
startTime ??= efficiency.now();
if (numTokens++ > 0) {
tps = (numTokens / (efficiency.now() - startTime)) * 1000;
}
};
const callback_function = (output: any) => {
self.postMessage({
standing: "replace",
output,
tps,
numTokens,
});
};
const streamer = new TextStreamer(processor.tokenizer, {
skip_prompt: true,
skip_special_tokens: true,
callback_function,
token_callback_function,
});
// Inform the principle thread we're beginning
self.postMessage({ standing: "begin" });
Put together textual content enter utilizing the processor (Strains 71-73)
apply_chat_template() codecs the dialog right into a immediate string appropriate for the mannequin. The add_generation_prompt: true possibility appends the mannequin’s response immediate, so it is aware of to generate output after the person’s message.
Course of textual content and pictures collectively (Strains 74-78)
Calls the processor with each textual content and pictures. Converts them right into a model-ready enter format (tensors on WebGPU). The non-obligatory do_image_splitting can break up pictures into a number of patches for finer evaluation, however it makes use of extra reminiscence.
Initialize streaming metrics (Strains 80-82)
startTime: retains observe of when the technology begins.
numTokens: counts the variety of tokens generated up to now.
tps: tokens per second, calculated dynamically.
Token callback perform (Strains 83-89)
Referred to as each time a brand new token is generated. Units startTime to the primary time a token is generated. Updates tps (tokens per second) for efficiency monitoring.
Output callback perform (Strains 90-97)
Sends the present output string, token metrics, and tpsagain to the principle thread for stay streaming.
Arrange the textual content streamer (Strains 99-104)
TextStreamer streams tokens as they're generated, somewhat than ready for the total output.
Choices:
skip_prompt: don’t resend the immediate textual content.
callback_function and token_callback_function deal with updates in real-time.
Notify the principle thread that technology has began (Line 107)
Tells the principle thread to indicate the “assistant is considering” state within the UI.
This block prepares the textual content+picture enter, initializes token streaming, and units up callbacks to ship incremental outputs and token metrics to the principle thread in real-time. It successfully permits stay assistant responses with streaming suggestions.
Calls the mannequin’s generate() perform to provide the assistant’s response. inputs incorporates the processed textual content and picture tensors. The non-obligatory past_key_values (presently commented out) would allow incremental technology for extra environment friendly future messages.
Sampling settings:
do_sample: false: deterministic technology (no random sampling).
repetition_penalty: 1.1: discourages repeating the identical tokens.
Different choices (e.g., top_k and temperature) are commented out, however might allow inventive sampling.
max_new_tokens: limits the variety of tokens generated on this name.
streamer: streams tokens in real-time again to the principle thread.
stopping_criteria: permits interruption if the person clicks cease.
return_dict_in_generate: true: returns a dictionary containing each past_key_values and generated sequences.
Error dealing with (Strains 126-131)
Catches any error throughout technology and sends it again to the principle thread for show within the UI.
Replace previous key values cache (Line 132)
Saves the past_key_values for potential future incremental technology, permitting sooner responses if you happen to proceed the dialog.
Decode the generated sequences (Strains 134-136)
Converts the mannequin’s token IDs into readable textual content. Setting skip_special_tokens: true removes tokens like [CLS], [PAD], or any model-specific particular tokens.
Ship closing output again to the principle thread (Strains 139-143)
Notifies the principle thread that the technology is completed. The decoded output is appended to the chat, and the UI can cease displaying the “considering” or streaming indicator.
This block generates the precise response. It streams tokens in real-time, applies deterministic or sampling-based technology, handles errors, caches previous key values for future effectivity, decodes the tokens into readable textual content, and eventually sends the entire response again to the principle UI.
async perform load() {
self.postMessage({
standing: "loading",
information: "Loading mannequin...",
});
// Load the pipeline and reserve it for future use.
const [processor, model] = await SmolVLM.getInstance((x: unknown) => {
// We additionally add a progress callback to the pipeline in order that we will
// observe mannequin loading.
self.postMessage(x);
});
self.postMessage({ standing: "prepared" });
}
Notify major thread that loading has began (Strains 146-149)
Instantly notifies the principle thread that mannequin loading is beginning, so the UI can show a loading message or progress bar.
Load the mannequin and processor (Strains 152-156)
Calls the SmolVLM.getInstance() static methodology to load each the processor and the mannequin.
Accepts an non-obligatory progress callback (x => self.postMessage(x)):
Any progress occasions emitted throughout mannequin loading are despatched again to the principle thread.
This permits the UI to replace particular person file obtain progress for the mannequin.
The loaded processor and mannequin are cached inside SmolVLM for future use, so repeated calls don’t reload them.
Notify major thread that the mannequin is prepared (Line 158)
As soon as loading finishes efficiently, ship a prepared sign. The UI can now allow the chat enter, picture uploads, and the “ship” button.
The load() perform is chargeable for loading the mannequin and processor, sending progress updates in the course of the course of, and eventually notifying the principle thread that the mannequin is prepared for inference. This retains the UI responsive and informs the person concerning the loading state.
self.addEventListener("message", async (e) => {
const { kind, information } = e.information;
swap (kind) {
case "examine":
examine();
break;
case "load":
load();
break;
case "generate":
stopping_criteria.reset();
generate(information);
break;
case "interrupt":
stopping_criteria.interrupt();
break;
case "reset":
past_key_values_cache = null;
stopping_criteria.reset();
break;
}
});
This code listens for messages from the principle thread and triggers the corresponding motion contained in the employee:
Pay attention for messages (Strains 161 and 162)
Each time the principle thread sends a message to the employee utilizing employee.postMessage, this occasion listener is triggered. The message is then destructured into kind (the motion to carry out) and information (the accompanying info, reminiscent of person messages).
Swap based mostly on message kind (Strains 164-187)
examine: calls the examine() perform to detect WebGPU assist and FP16 availability.
load: calls the load() perform to load the mannequin and processor, sending progress updates to the principle thread.
generate: resets the stopping_criteria and runs the generate() perform with the supplied messages. This triggers the mannequin to provide outputs.
interrupt: interrupts the present technology course of if it’s operating. Helpful when the person clicks “Cease”.
reset: clears the cached previous key values and resets the stopping standards, making ready the mannequin for a contemporary dialog.
This block serves because the employee’s central message router. It connects the principle thread’s actions (load mannequin, generate output, cease, reset) to the corresponding employee features, enabling asynchronous, non-blocking inference within the browser.
The file begins with "use consumer"; to point that this part is a client-side React part in Subsequent.js. This ensures that hooks like useState and useEffect work accurately on the consumer.
Subsequent, we import the cn utility from our utils.tsx file. That is sometimes a small helper that conditionally combines class names, which is helpful for making use of dynamic CSS lessons.
We additionally import the Message kind from sorts.ts. This offers kind security when dealing with chat messages, making certain every message object has the proper construction anticipated by the part.
Lastly, we outline the props for the Chat part utilizing a TypeScript interface ChatProps. This contains:
messages: an array of Message objects representing the dialog historical past.
isThinking: a boolean indicating whether or not the assistant is presently making ready a response (earlier than any tokens are streamed).
isStreaming: a boolean indicating whether or not the assistant is actively streaming its response token by token.
This setup ensures the part receives all mandatory information and state flags to render the chat dialog dynamically and accurately.
The Chat perform is the principle part chargeable for rendering the dialog between the person and the assistant. It receives three props: messages, isThinking, and isStreaming.
The primary block handles the empty state: if no messages exist but, it shows a centered placeholder with the textual content "Add your pictures and chat with it". This offers a pleasant immediate to the person earlier than any interplay happens.
As soon as messages exist, the part maps over every message and renders them sequentially. Every message is wrapped in a
with lessons utilized conditionally utilizing the cn utility: messages from the person are aligned to the proper (ml-auto, items-end), whereas assistant messages are aligned to the left (items-start). Each have a max width of 80% to forestall stretching throughout the complete chat window.
Inside every message, the part iterates over message.content material. This permits the chat to render blended content material: textual content or pictures. For textual content content material (c.kind === "textual content"), it renders a
with background shade relying on the sender: blue for the person and grey (with darkish mode assist) for the assistant. The textual content itself is displayed inside this styled container.
For picture content material (c.kind === "picture"), it renders an ingredient with rounded corners and a most width, displaying the uploaded or assistant-provided pictures inline with the dialog.
In spite of everything messages are rendered, the part reveals the assistant’s standing. If isThinking is true, it shows a small animated bouncing dot indicator to indicate the assistant is making ready a response. If isStreaming is true (however isThinking is fake), it reveals a easy textual content indicator "Assistant is writing…", letting the person know that tokens are actively being streamed and the assistant is producing its response.
General, this part handles dynamic rendering of textual content and picture messages whereas offering clear visible suggestions concerning the assistant’s present state.
The ImagePreview part shows a small thumbnail of an uploaded picture with an choice to take away it. It accepts two major props: src (the picture supply) and onRemove (a callback perform to take away the picture). It additionally helps commonplace
attributes through ...props.
The part makes use of a hover state (useState(false)) to trace whether or not the mouse is presently over the picture container. This permits the cross (take away) button to seem solely when hovering.
The basis
wraps the picture and the cross icon. It spreads any further props onto the container and units up onMouseEnter and onMouseLeave occasions to toggle the hover state. The container additionally has the category relative to make sure that the cross icon, which is totally positioned, is positioned relative to this container.
Contained in the container, a CrossIcon is rendered. Its onClick is linked to onRemove in order that clicking it removes the picture. The icon is totally positioned on the top-right nook (top-1 right-1) and solely seen when hover is true; in any other case, it’s hidden.
Lastly, the ingredient shows the precise picture, filling the container whereas sustaining the facet ratio utilizing object-cover, and it has rounded corners for a neat look.
General, this part offers a compact, reusable picture preview with a hover-based take away button, good for displaying uploaded pictures in a chat or kind interface.
The Progress part visually represents the progress of file downloads or model-loading duties within the SmolVLM app. It accepts three props:
textual content: the label for the progress merchandise, often the filename or process description.
proportion: the completion proportion of the duty, which defaults to 0 if not supplied.
complete: the entire measurement of the file or process, used to indicate a human-readable measurement.
The formatBytes perform converts a numeric byte worth right into a human-readable format (B, kB, MB, GB, TB). It calculates the suitable unit by taking the logarithm of the scale with base 1024 after which codecs the consequence with two decimal factors.
Within the part itself, a container
represents the total progress bar, styled with a grey background. Inside it, one other
represents the finished portion of the progress bar, styled with a blue background and a dynamic width based mostly on the proportion prop. The interior
additionally shows the textual content together with the proportion, and if a legitimate complete is supplied, it appends the formatted complete measurement utilizing formatBytes.
General, this part is a reusable, clear option to present the loading standing of a number of information or duties, with each visible and textual suggestions.
The sorts.ts file defines TypeScript sorts for the chat messages used within the SmolVLM app.
MessageContent: This can be a union kind that represents the content material of a single message. A message can both be:
An picture: { kind: "picture"; picture: string }: the place picture is a data-URL string of the uploaded or generated picture.
A textual content: { kind: "textual content"; textual content: string }: the place textual content is a string representing the written message content material.
Message: This sort represents a full chat message, which consists of:
function: both "person" or "assistant", indicating who despatched the message.
content material: an array of MessageContent objects. This permits a single message to comprise a number of items of content material (e.g., a mix of textual content and pictures).
These sorts present a structured option to deal with each textual content and picture messages, making it simpler to render them accurately in elements reminiscent of Chat.tsx and to take care of kind security all through the app.
import React from "react";
export perform cn(...lessons: Array) {
return lessons.filter(Boolean).be part of(" ");
}
The cn perform is a small utility that conditionally combines CSS class names right into a single string.
It accepts any variety of arguments (...lessons) the place every argument generally is a string, false, null, or undefined.
Contained in the perform, lessons.filter(Boolean) removes any falsy values (false, null, undefined, "").
Lastly, .be part of(" ") concatenates the remaining legitimate class names with areas, producing a single string prepared for use as a className attribute in JSX.
Course info:
86+ complete lessons • 115+ hours hours of on-demand code walkthrough movies • Final up to date: October 2025 ★★★★★ 4.84 (128 Scores) • 16,000+ College students Enrolled
I strongly consider that if you happen to had the proper instructor you possibly can grasp pc imaginative and prescient and deep studying.
Do you assume studying pc imaginative and prescient and deep studying needs to be time-consuming, overwhelming, and sophisticated? Or has to contain complicated arithmetic and equations? Or requires a level in pc science?
That’s not the case.
All you want to grasp pc imaginative and prescient and deep studying is for somebody to clarify issues to you in easy, intuitive phrases. And that’s precisely what I do. My mission is to alter schooling and the way complicated Synthetic Intelligence matters are taught.
If you happen to're critical about studying pc imaginative and prescient, your subsequent cease must be PyImageSearch College, probably the most complete pc imaginative and prescient, deep studying, and OpenCV course on-line at this time. Right here you’ll discover ways to efficiently and confidently apply pc imaginative and prescient to your work, analysis, and initiatives. Be part of me in pc imaginative and prescient mastery.
Inside PyImageSearch College you will discover:
&examine; 86+ programs on important pc imaginative and prescient, deep studying, and OpenCV matters
&examine; 86 Certificates of Completion
&examine; 115+ hours hours of on-demand video
&examine; Model new programs launched recurrently, making certain you may sustain with state-of-the-art methods
&examine; Pre-configured Jupyter Notebooks in Google Colab
&examine; Run all code examples in your internet browser — works on Home windows, macOS, and Linux (no dev surroundings configuration required!)
&examine; Entry to centralized code repos for all 540+ tutorials on PyImageSearch
&examine; Straightforward one-click downloads for code, datasets, pre-trained fashions, and so on.
&examine; Entry on cellular, laptop computer, desktop, and so on.
On this challenge, we constructed a browser-based multimodal chat utility powered by the SmolVLM mannequin from Hugging Face. The app permits customers to add pictures and work together with an AI assistant that may analyze visuals and generate textual content responses in actual time. Key options embody WebGPU acceleration, streaming token updates, and progress monitoring throughout mannequin loading. The interface helps Markdown formatting, protected HTML rendering, and easy animations for a responsive person expertise. By leveraging libraries reminiscent of @huggingface/transformers, better-react-mathjax, dompurify, framer-motion, and marked, we created a strong, interactive, and safe chat system that showcases the ability of recent multimodal AI immediately within the browser.
Thakur, P. “Operating SmolVLM Regionally in Your Browser with Transformers.js,” PyImageSearch, P. Chugh, S. Huot, G. Kudriavtsev, and A. Sharma, eds., 2025, https://pyimg.co/j1ayp
@incollection{Thakur_2025_Running-SmolVLM-Regionally-in-Browser-with-Transformers-js,
creator = {Piyush Thakur},
title = {{Operating SmolVLM Regionally in Your Browser with Transformers.js}},
booktitle = {PyImageSearch},
editor = {Puneet Chugh and Susan Huot and Georgii Kudriavtsev and Aditya Sharma},
yr = {2025},
url = {https://pyimg.co/j1ayp},
}
To obtain the supply code to this publish (and be notified when future tutorials are revealed right here on PyImageSearch), merely enter your e mail handle within the kind beneath!
Obtain the Supply Code and FREE 17-page Useful resource Information
Enter your e mail handle beneath to get a .zip of the code and a FREE 17-page Useful resource Information on Laptop Imaginative and prescient, OpenCV, and Deep Studying. Inside you will discover my hand-picked tutorials, books, programs, and libraries that can assist you grasp CV and DL!
Concerning the Creator
Hello, I’m Piyush! I’m a Machine Studying Engineer and Full Stack Net Developer with a ardour for open-source initiatives, writing, and exploring new applied sciences.
Entry the code to this tutorial and all different 500+ tutorials on PyImageSearch
Enter your e mail handle beneath to be taught extra about PyImageSearch College (together with how one can obtain the supply code to this publish):
What's included in PyImageSearch College?
Easy accessibility to the code, datasets, and pre-trained fashions for all 500+ tutorials on the PyImageSearch weblog
Excessive-quality, nicely documented supply code with line-by-line explanations (making certain you recognize precisely what the code is doing)
Jupyter Notebooks which can be pre-configured to run in Google Colab with a single click on
Run all code examples in your internet browser — no dev surroundings configuration required!
Assist for all main working techniques (Home windows, macOS, Linux, and Raspbian)
Full entry to PyImageSearch College programs
Detailed video tutorials for each lesson
Certificates of Completion for all programs
New programs added each month! — keep on high of state-of-the-art tendencies in pc imaginative and prescient and deep studying
PyImageSearch College is de facto one of the best Laptop Visions "Masters" Diploma that I want I had when beginning out. With the ability to entry all of Adrian's tutorials in a single listed web page and with the ability to begin enjoying round with the code with out going by the nightmare of establishing every little thing is simply wonderful. 10/10 would suggest.
Sanyam BhutaniMachine Studying Engineer and 2x Kaggle Grasp
AI utilization has develop into customary follow in software program growth, with 85% of builders in a latest JetBrains survey citing common use of AI instruments for coding and growth. Moreover, 62% had been counting on at the very least one AI-powered coding assistant, agent, or code editor. Solely 15% of respondents had not adopted AI instruments of their each day work.
These findings had been included in JetBrains’ State of the Developer Ecosystem Report 2025, which was unveiled October 15. The survey coated matters together with using AI instruments, which programming languages builders presently use and need to use, and their perceptions of the present job marketplace for builders.
The JetBrains report notes that 68% of builders anticipate AI proficiency will develop into a job requirement. Some 29% of builders mentioned they had been hopeful in regards to the growing function of AI in society and 22% mentioned they had been excited. Nevertheless, 17% reported being anxious and 6% fearful. Probably the most generally used AI instruments among the many builders had been ChatGPT (41%) and GitHub Copilot (30%). The highest 5 considerations about AI reported by the builders had been the standard of code (23%), restricted understanding of advanced code and logic by AI instruments (18%), privateness and safety (13%), destructive impact on coding and growth abilities (11%), and lack of context consciousness (10%). The highest 5 advantages of utilizing AI in coding and software program growth, the builders reported, had been elevated productiveness (74%), sooner completion of repetitive duties (73%), much less time spent looking for info (72%), sooner coding and growth (69%), and sooner studying of latest instruments and applied sciences (65%).
“This is without doubt one of the least visited locations on planet Earth and I acquired to open the door,” Matty Jordan, a building specialist at New Zealand’s Scott Base in Antarctica, wrote within the caption to the video he posted to Instagram and TikTok in October 2023.
Within the video, he guides viewers by means of the hut, declaring the place the lads of Ernest Shackleton’s 1907 expedition lived and labored.
The video has racked up thousands and thousands of views from everywhere in the world. It’s additionally type of a miracle: till very just lately, those that lived and labored on Antarctic bases had no hope of speaking so readily with the skin world. That’s beginning to change, because of Starlink, the satellite tv for pc constellation developed by Elon Musk’s firm SpaceX to service the world with high-speed broadband web.
That is our newest story to be changed into a MIT Know-how Overview Narrated podcast, which we’re publishing every week on Spotify and Apple Podcasts. Simply navigate to MIT Know-how Overview Narrated on both platform, and comply with us to get all our new content material because it’s launched.
The must-reads
I’ve combed the web to search out you immediately’s most enjoyable/vital/scary/fascinating tales about expertise.
1 OpenAI has launched its personal internet browser Atlas has an Ask ChatGPT sidebar and an agent mode to finish sure duties. (TechCrunch) + It runs on Chromium, the open-source engine that powers Google’s Chrome. (Axios) + OpenAI believes the way forward for internet looking will contain chatting to its interface. (Ars Technica) + AI means the tip of web search as we’ve identified it. (MIT Know-how Overview)
In the event you’ve seen your electrical energy invoice is greater than regular not too long ago, you’re not alone. Energy is getting costlier all over the place, outpacing inflation. One main wrongdoer? The flurry of recent knowledge facilities being constructed to satisfy demand from the AI sector.
To seek out out extra, I requested my colleague Umair Irfan, who covers power coverage, for Vox’s each day e-newsletter, As we speak, Defined. Our dialog is under, and you’ll join the e-newsletter right here for extra conversations like this.
What’s been occurring with power costs these days?
Electrical energy costs have been going up fairly dramatically over the previous 12 months. In some locations, they’re rising by double-digit percentages, and so they’re projected to rise even additional. We’re speaking about costs which are paid by shoppers, so that is truly exhibiting up on individuals’s energy payments, which is why it’s getting a variety of consideration.
There’s a pair causes behind this. One is that electrical energy costs had been saved artificially low through the Covid-19 pandemic, as a result of the electrical energy business is closely regulated. Loads of regulators had been underneath public strain to stop the utilities from elevating costs as a result of we had been already coping with inflation and different cost-of-living points. Now a few of these restrictions have turn out to be uncorked, and we’re seeing a rebound.
On prime of that, all the inputs for electrical energy have gotten much more costly. Supplies prices are rising normally, after which the Trump administration’s tariffs on issues like metal and aluminum are making it more durable to get the {hardware} to do issues like construct energy traces and even change present energy traces. Gasoline costs for coal and pure gasoline are fairly unstable, and there’s been an increase in pure gasoline costs. Pure gasoline is the primary manner we produce electrical energy right here within the US.
We’re additionally seeing a fairly large improve in total power demand for the primary time in a really very long time. For the previous 20-odd years, we’ve been seeing effectivity counteract power demand will increase, and so our total power demand has held pretty flat. Simply up to now couple of years, we’ve seen a giant improve in electrical energy utilization, and that’s pushed by this proliferation of knowledge facilities, significantly these there to energy the AI business.
You may have a giant story out about how these knowledge facilities are contributing to the value spike, in some circumstances even after they’re not constructed. What’s taking place there?
Simply final week, the general public advocate for the state of Maryland despatched a letter to the grid operator for the area, telling them that they actually need to rein in power hypothesis, as a result of it’s beginning to increase individuals’s costs.
The way in which that works is that with a view to construct an information middle, it’s important to procure a certain quantity of energy with a view to just remember to can truly maintain it working. And so what you’re seeing is, these tech firms are going to totally different utilities and buying round and asking them, What value are you able to give me for this amount of electrical energy? And the way quickly?
It seems that in some circumstances, these tech firms are buying to a number of utilities, and people utilities, in flip, are telling the grid operator, Hey, we’re going to wish this a lot electrical energy within the subsequent few years. The priority is that they’re double counting, as a result of these tech firms are going to a number of utilities and a number of jurisdictions telling them that they’re going to wish this a lot electrical energy, and so they’re simply window-shopping for the time being, however utilities are treating these as actual bids.
The opposite factor is that we’re not completely positive that a variety of these knowledge facilities are going to be constructed. There are some fairly wild estimates for what number of extra knowledge facilities we’re going to wish. It’s not clear that the present developments we’re seeing are going to proceed.
All which means is that you simply’re going to be constructing a variety of infrastructure to help knowledge facilities whose demand is probably not there to truly pay for that infrastructure. And what which means, finally, is that ordinary prospects will find yourself holding the bag.
That is in Maryland, however the grid operator covers a lot of the East Coast. We’ve bought two massive gubernatorial races developing in Virginia and New Jersey. Is that developing on the marketing campaign path?
It has undoubtedly turn out to be a giant challenge within the New Jersey governor’s race. Each side are blaming insurance policies from the opposite celebration for elevating power costs. The Republican within the race is blaming renewable power for driving up electrical energy prices, and the Democrat is blaming the Trump administration for canceling a variety of incentives for extra renewable power to be on the grid, in addition to the infrastructure to help it. Renewable power is true now the most affordable and quickest manner so as to add electrical energy to the facility grid, and by taking that off the desk, you’re taking out one of many most cost-effective and best methods to carry extra electrical energy onto the market.
In Virginia, the added complication is that it’s dwelling to one of many largest concentrations of knowledge facilities on this planet. Loudoun County, simply outdoors of DC, has what’s referred to as Datacenter Alley, the place an enormous chunk of web site visitors goes by means of; it’s additionally dwelling to the biggest focus of hyperscale knowledge facilities for powering AI applied sciences. It is a very massive, energy-hungry sector, and it’s a contributor to the native economic system, however it additionally requires a variety of water, a variety of electrical energy, and now there’s been pushback. Many shoppers in Virginia and in neighboring states like West Virginia have began to protest in opposition to knowledge facilities as a result of they’re involved about electrical energy costs and different environmental prices being imposed by them.
What can shoppers anticipate to occur with electrical energy costs going ahead?
Within the close to time period, electrical energy costs are more likely to proceed to go up. There doesn’t appear to be a straightforward out, as a result of all the identical elements which are driving up electrical energy costs proceed to be in place.
However the factor to recollect is that electrical energy is a subset of power spending. In the event you take a look at the general power image, shoppers are literally more likely to find yourself saving cash on family power over time, and that’s as a result of we’re switching from fossil fuels to electrical energy. The largest share of that is switching from gasoline automobiles to electrical automobiles: As we join extra electrical automobiles to the facility grid, they will use extra electrical energy, however electrical automobiles are extra environment friendly than gasoline automobiles, so the general power we use per family will ultimately begin to decline. We’ll see that with different home equipment, like stoves and furnaces, as we swap to electrical energy. Electrical energy utilization will improve, however the total power footprint will lower. And we will anticipate over the center and long run for individuals to truly begin to economize, supplied that these developments proceed.
In order for you to step up your images sport, and graduate out of your cellphone, why not go all the best way to the highest-resolution digicam in the marketplace? Usually, we advise {that a} extra reasonably priced digicam may be the very best decide for most individuals in our information to mirrorless cameras, however at this value—why not go massive?
Courtesy of Sony
The huge 61-megapixel, full-frame sensor within the A7R V is the most important sensor you may get with out leaping into medium format (which is considerably dearer and bulkier). If that is not sufficient, there’s truly a fair higher-resolution chance that mixes 16 photographs right into a single 240-MP picture (as long as your topic is static, e.g., a panorama). That ought to print billboard-size with out difficulty.
Sure, the megapixel race is foolish and largely over, however I’ll say that I’ve shot fairly a bit with the A7R C (which makes use of the identical sensor). The pictures from this 60-MP sensor are noticeable sharper, and the dynamic vary is visibly higher than what I get from the A7R II (which has a 40-MP sensor). That is clearly the case onscreen, when pixel peeping, however I additionally discover the distinction once I print photographs.
For those who do not want all these megapixels, and you continue to need to avoid wasting cash, I’ve excellent news, our high decide for most individuals, the Sony A7 IV (9/10, WIRED Recommends), is on sale as effectively for $700 lower than ordinary.
{Photograph}: Sony
It is a 33-megapixel, full-frame digicam that, whereas solely half the decision of the A7R V, is loads sharp and boasts a number of video-oriented options you will not discover within the higher-resolution mannequin. It has very practically the identical glorious dynamic vary and the most effective autofocus system in the marketplace.
With out getting too deep within the weeds of video technicalities, the A7 IV can file 4K/30p video by oversampling from a 7K sensor area. Alternatively, the A7R V employs what’s referred to as line-skipping to realize the identical 4K/30p recording. This technique of recording ends in lowered sharpness and generally causes aliasing points.
The quick story: If you wish to file video at full sensor measurement, the A7 IV is the best way to go. In actual fact, whereas there are higher nonetheless cameras just like the Sony A7R V, and higher video cameras, nothing combines the 2 fairly in addition to the A7 IV. For those who’re trying to do a mixture of nonetheless and video work, this is likely one of the finest buys in the marketplace, particularly at this value.